Home »
Broker Portal
The broker portal enables lenders to grant their brokers direct access to exclusive broker-only application forms, specifically designed with the broker channel in mind.
At a high level, the broker portal is the lender’s internal broker platform and is set up as such.
For example, ‘Lender One’ would be able to request the creation of a broker platform named ‘Lender One Broker Portal’.
This will enable ‘Lender One’ to function as an internal aggregator, allowing it to set up new broker companies and link new brokers to these companies, which will have access to the direct approved broker application forms.
The following will detail:
- The broker onboarding process for setting up new broker companies and brokers
- Allocating application forms to the broker portal
- Access levels
Setup
Upon agreement, Nimo will create a new Broker environment and link it to the Lender’s main Nimo staff platform/portal.
Once created, Nimo will provide ‘aggregator’ level access to a superuser, who will have the ability to:
- Create new users for internal staff
- Setup new companies
- Setup new brokers
Adding a new broker company
- To add a new company, click on the Administration layer on the left panel.
- This will bring up the interface to add companies and new broker users.
- Click on the Company tab.
- Click on ‘Add Company’.
- A pop-up will appear to enter the name of the new Broker Company. Enter the company name and press save.

Adding a new broker user and linking to company
- To add a new broker, click on the Administration layer on the left panel.
- This will bring up the interface to add companies and new broker users.
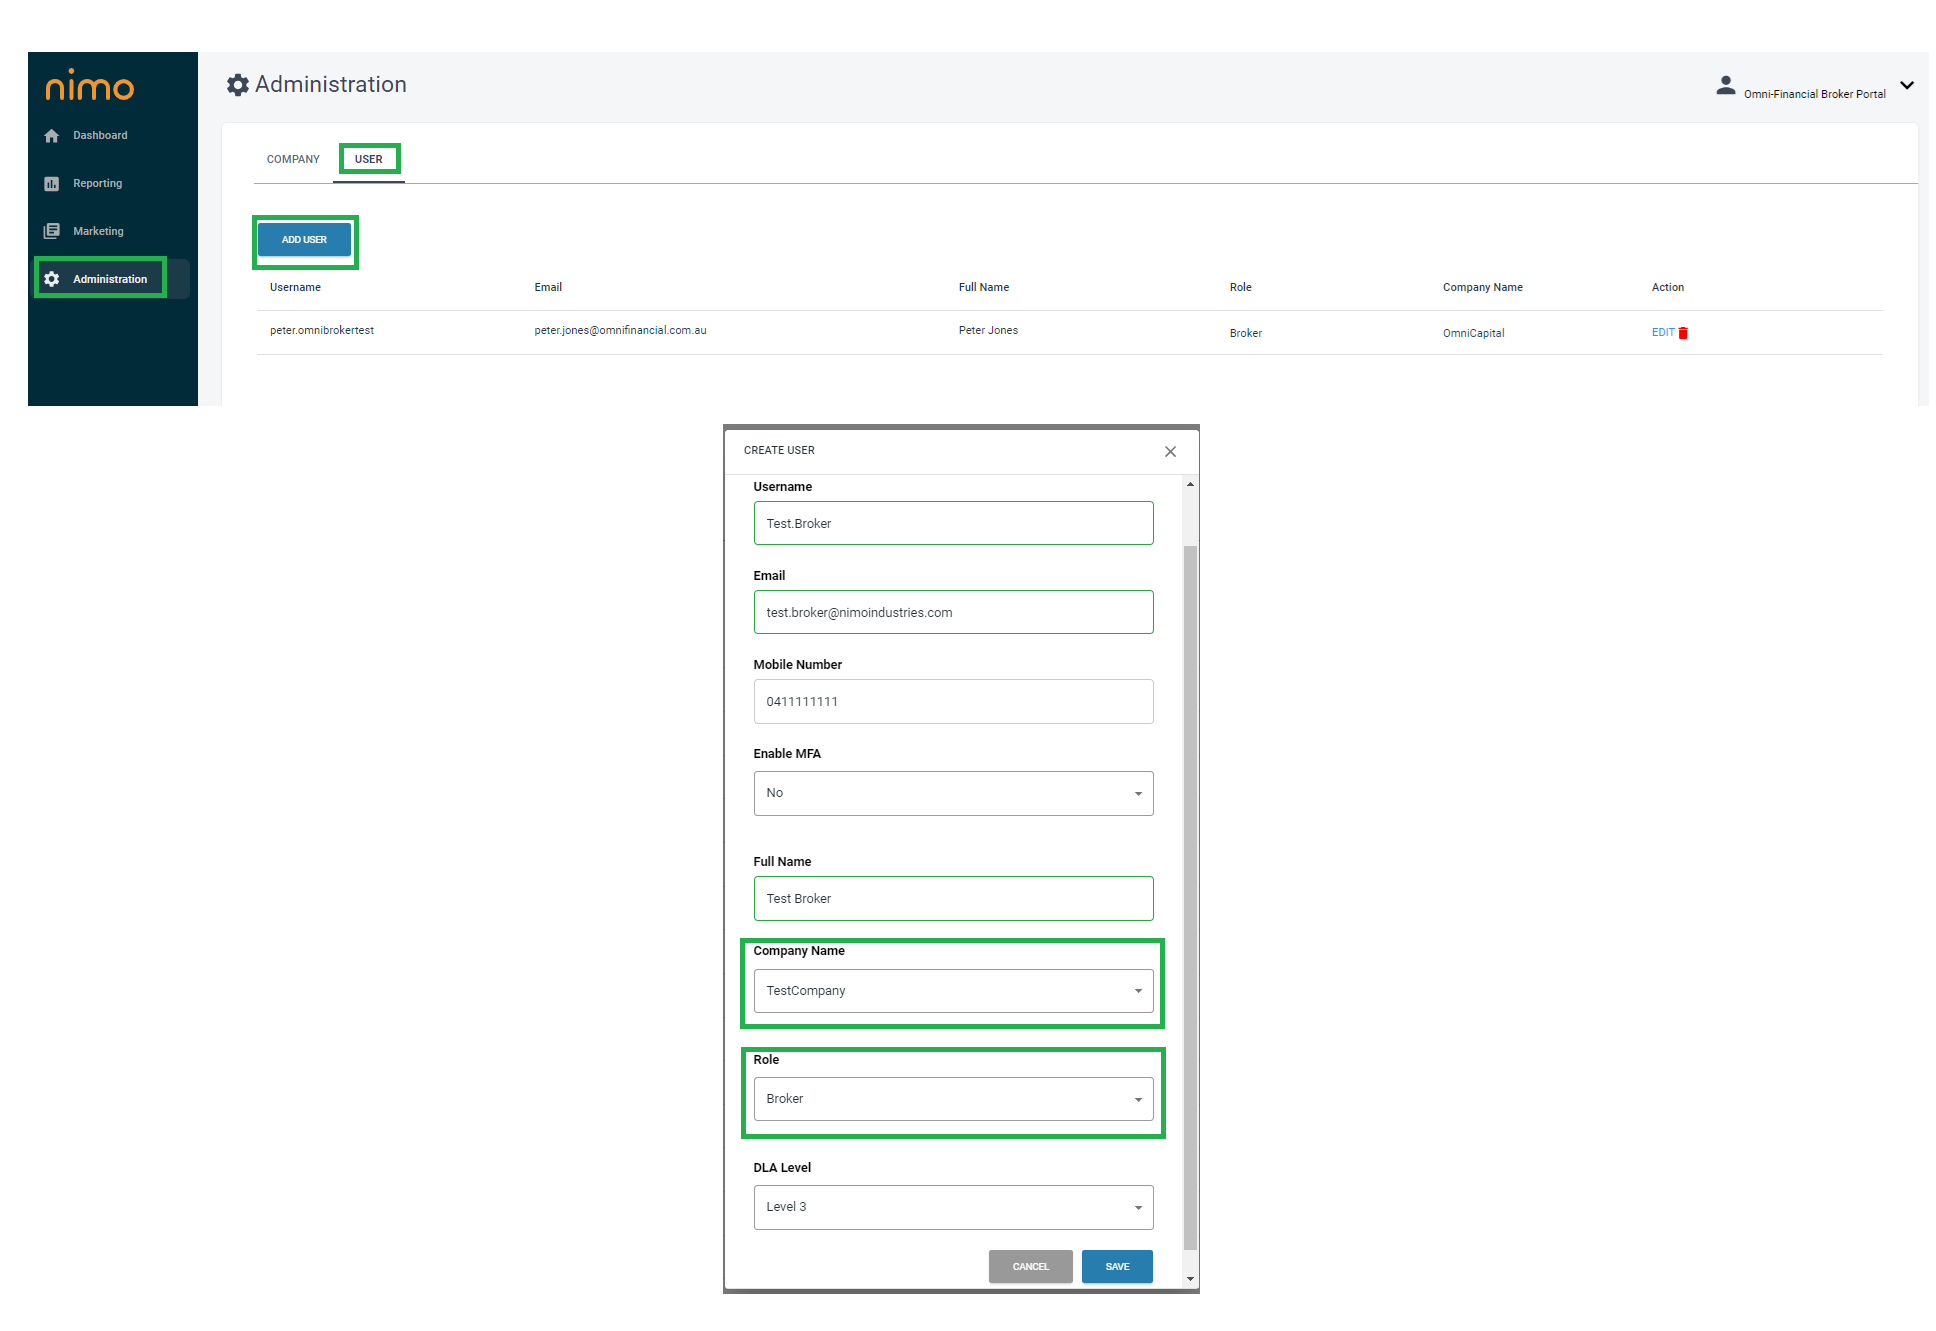
- Click on the User tab.
- Click on ‘Add User’.
- A pop-up will appear to enter the broker details to set them up as a user. This will include assigning them to a company they are associated with (created in the company setup step), and their role will be set to Broker as highlighted in the image below.
Upon user creation, the broker will receive an email with a link to their broker portal login details.
Broker Requesting Form Access from Lender
The first time the broker logs in to the broker portal, they will not see any application forms.
To gain access to the forms, they need to follow the steps below to make a request to the lender and be approved.
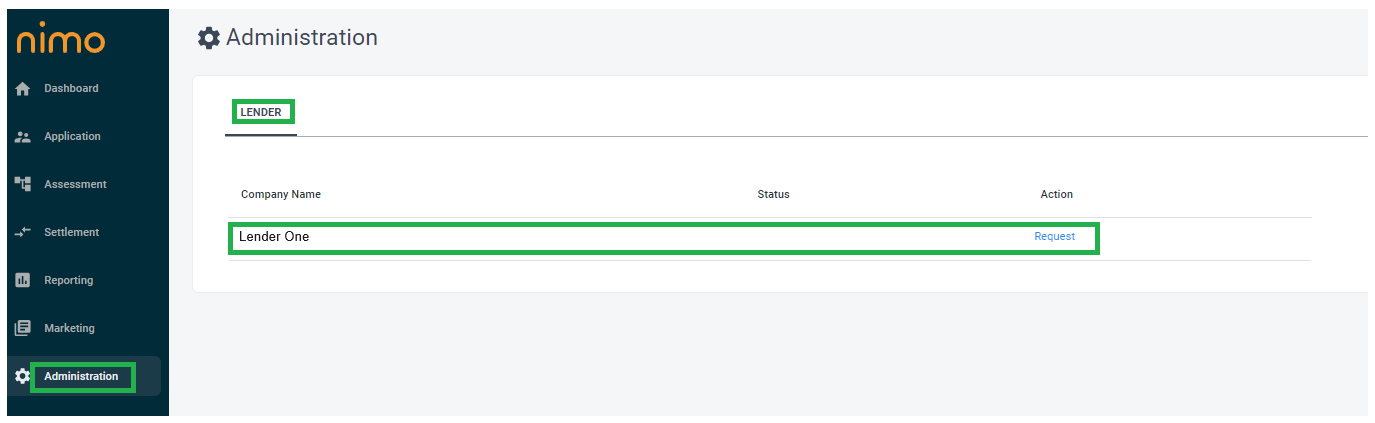
- To request access to the lender application forms, the broker should click on the Administration layer in the left panel.
- On the interface, a list of lenders available for the broker to request access to will be displayed.
- The broker should click on the ‘Request’ button in blue under the Action label.
- This action will change the status to ‘pending’, indicating that the request has been sent to the lender for approval of the broker’s access to their application forms.
Lender approval for broker’s request to gain access to lender broker forms.
The lender would receive a request from the broker to access their application form allocated for brokers.
After broker due diligence is completed and accredited by the lender, the lender can approve the broker by following the steps below.
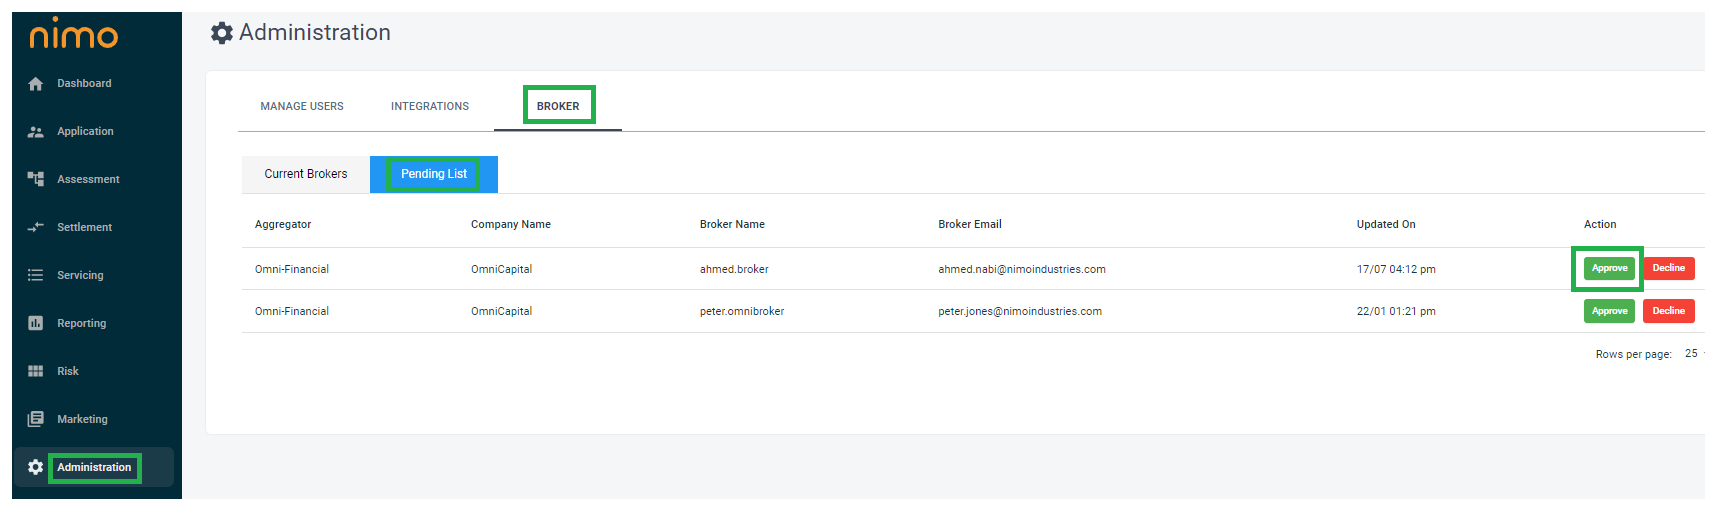
- Click on the Administration layer in the left panel.
- Click on the Broker tab.
- Click on the Pending List tab.
This view will display all the brokers requesting access to the lenders’ broker allocated application forms. If the lender presses the ‘Approved’ button, it will provide the broker with access to the broker allocated application forms from within the broker portal.
Once the broker has been approved for access they can view the allocated form by:
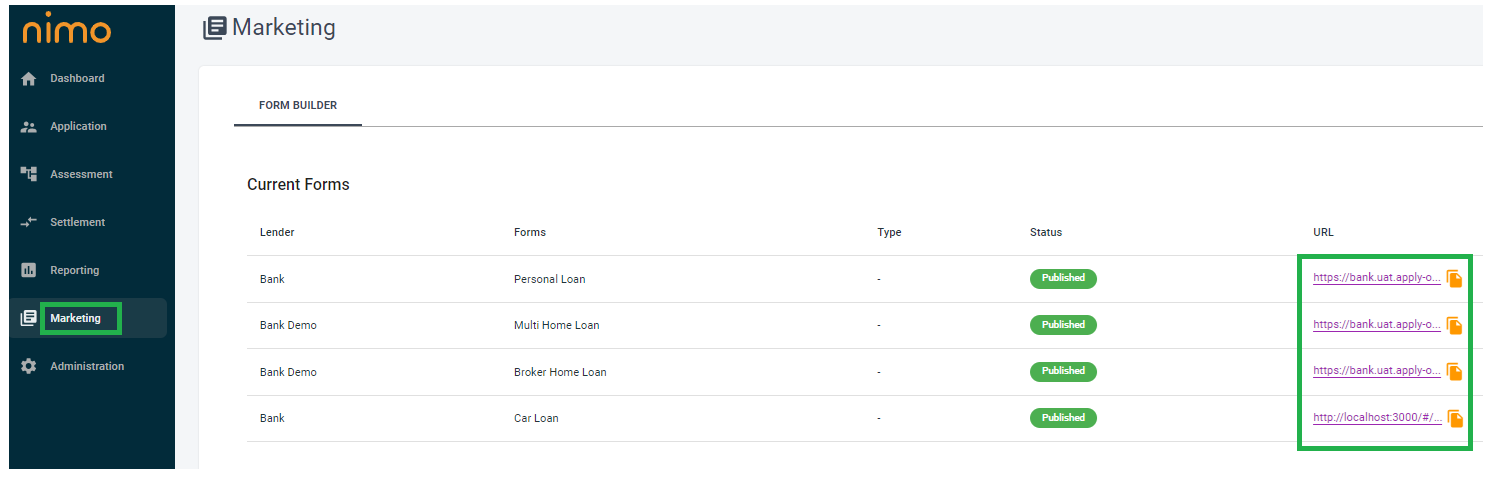
Click on the Marketing layer in the left panel.
This action will display all the broker forms available for your lender’s use
The broker can do this by clicking on the URL next to each form to access the application form.
Any applications completed via the broker portal will also appear in the Lenders’ staff portal.
Lender Allocating / Linking Forms to the Lenders Broker Portal.
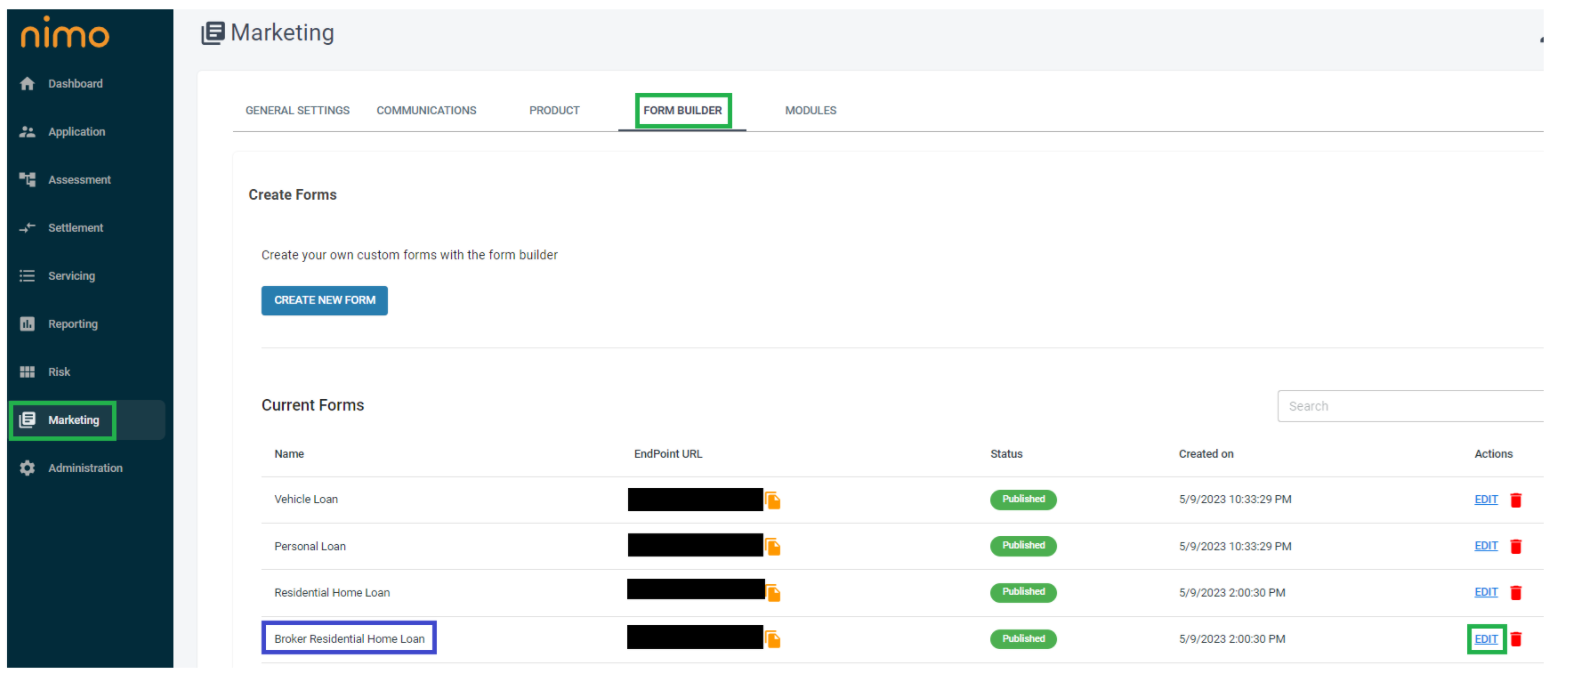
- To assign an application form to the broker portal, click on the Marketing layer in the left panel.
- Click on the Form Builder tab.
- This will open the interface displaying all current customer application forms.
- Find the application form you wish to assign to the broker and click the EDIT button.
It is recommended to have a separate application form for brokers for tracking and customisation purposes.
This can be done by sending a request to Nimo Support (support@nimoindustries.com) and request a duplication of an existing customer application form. (We will temporarily add the word Broker at the front of the original form name which you can change later if you choose.)
The example below illustrates a duplicate of the Residential Home Loan, which has been duplicated and relabelled as the Broker Residential Home Loan.
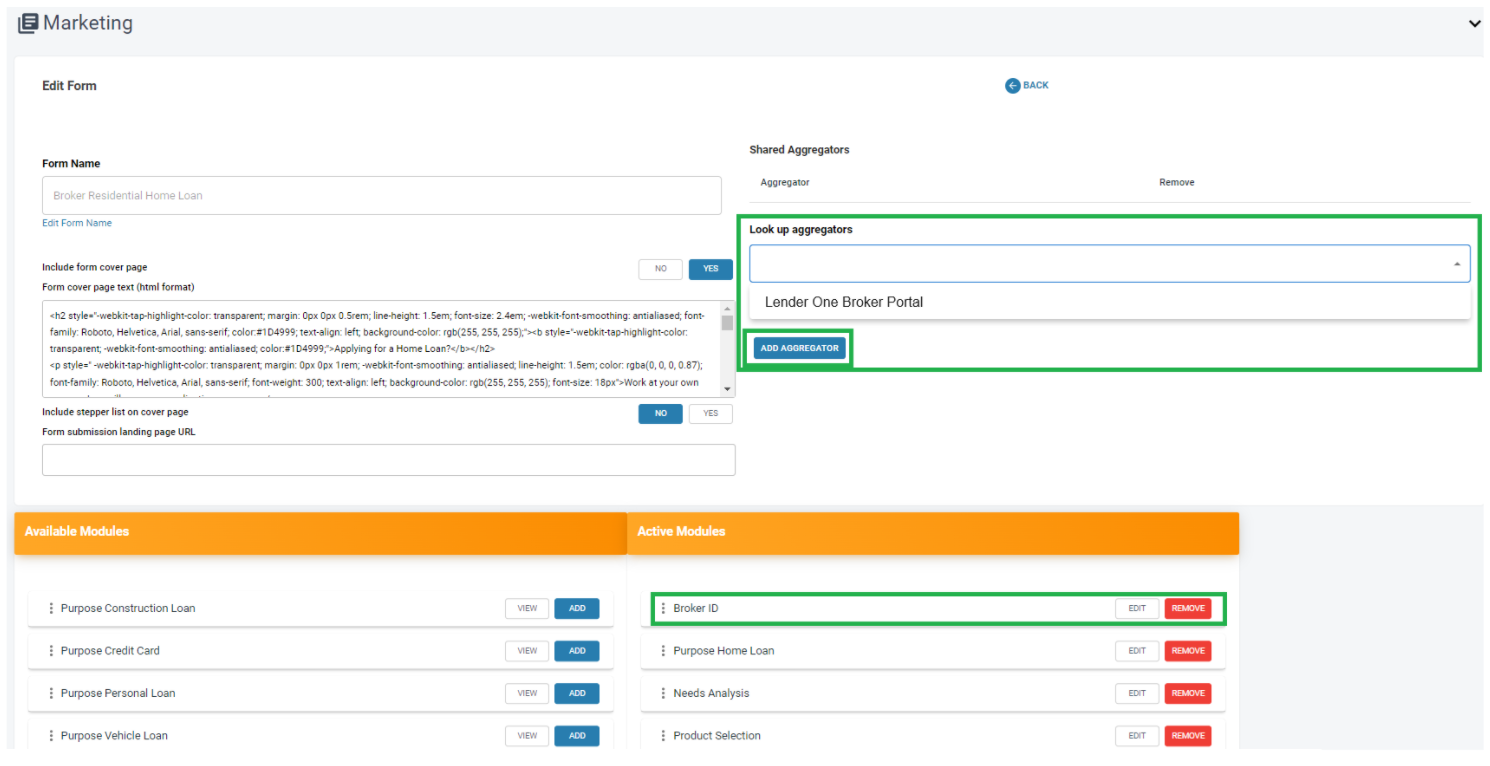
Step 1.
Within the application form builder, you will find two columns of Nimo modules (application pages), which are the building blocks for creating an application form.
In the left column of Available Modules, locate the module named ‘Broker ID’ and click the ‘Add’ button in blue.
This action will add the module to the right-hand column titled ‘Active Modules’.
Using your mouse, drag and drop this module to the first position
Step 2.
In the top right corner, you will see ‘Shared Aggregators’ and a dropdown list labelled ‘Look up Aggregators’.
Click on the ‘Look up Aggregators’ dropdown and you will find the linked Broker portal, connected to your Nimo Staff platform/portal.
Choose the available broker portal and click the ‘Add Aggregator’ button.
Scroll down to the bottom of the page and click the save button and republish the form on the main form builder screen.
Reallocate Broker Applications
When an application needs to be reassigned between Brokers fro mthe same Broker Comany (not Aggregator level) the Broker Company role will change the assigned Broker from their company by Selecting the loan application in the Application Menu, selecting the check box and reassigning the application to an existing Broker from their company.
Access Levels